Manual normalization
Normalization is the act of making copies of a file for the purpose of access or preservation. Usually, Archivematica carries out this action during the Normalization microservice on the Ingest tab, using normalization rules from the Preservation Planning tab to create access and/or preservation derivatives.
However, in some cases it makes sense for users to create access or preservation copies outside of Archivematica - for example, as part of a digitization workflow, or when working with files that cannot be normalized by Archivematica’s tool suite.
The term “manual normalization” is used to refer to two different workflows in Archivematica:
- Adding normalized files to a transfer before ingesting it into Archivematica
- Adding normalized files to the SIP during the Normalize microservice
For both options, the user has the choice to add PREMIS event detail metadata that describes the manual normalization events.
Manually normalized derivatives can be added to Standard transfers. Other transfer types are not supported.
On this page
- Workflow 1: Manual normalization prior to transfer to Archivematica
- Workflow 2: Manual normalization during Ingest
- Adding PREMIS eventDetail for manual normalization
- Normalizing files with the same name
Workflow 1: Manual normalization prior to transfer to Archivematica
This workflow assumes that users have created access and/or preservation copies of their files before the material is transferred into Archivematica.
For example, during a digitization project, high-resolution original (master)
images as well as lower-resolution access copies may be created. It would be
redundant of Archivematica to duplicate this normalization work. By adding a
folder called manualNormalization to the transfer prior to processing, the
Archivematica can recognize that normalization work has already been done so
that Archivematica does not replicate the effort.
Note
This workflow requires a one-to-one relationship an original object and its access or preservation derivative. Creating multiple access or preservation derivatives that relate to a single original object is not supported.
Create your files - the original (master) copies and the manually normalized derivatives. Note that the filenames must match in order for Archivematica to recognize the links between the original file and its derivatives.
to-be-preserved/
├── hooded-pitcher-plant.gif
├── hooded-pitcher-plant.png
├── hooded-pitcher-plant.tif
├── ornamental-onion.gif
├── ornamental-onion.png
├── ornamental-onion.tif
├── pepperbox-poppy.gif
├── pepperbox-poppy.png
└── pepperbox-poppy.tif
In this example, there are three copies of each file - a GIF, a PNG, and a TIFF. The PNG files will be used as the original files, the TIFF files as preservation derivatives, and the GIF files as access derivatives.
Create a transfer directory and place the original files inside at the top level.
my-manually-normalized-material/
├── hooded-pitcher-plant.png
├── ornamental-onion.png
└── pepperbox-poppy.png
Create a subdirectory called
manualNormalization(note the capital N). Inside of themanualNormalizationdirectory, create directories calledaccessandpreservation(you do not need both - if you only have preservation copies, create only thepreservationdirectory, and vice versa). Place your manually normalized files in the appropriate directory.my-manually-normalized-material/ ├── manualNormalization │ └── access │ ├── hooded-pitcher-plant.gif │ ├── ornamental-onion.gif │ └── pepperbox-poppy.gif │ └── preservation │ ├── hooded-pitcher-plant.tif │ ├── ornamental-onion.tif │ └── pepperbox-poppy.tif ├── hooded-pitcher-plant.png ├── ornamental-onion.png └── pepperbox-poppy.png
In the example above, you can see that the GIF access derivatives have been moved to the
manualNormalization/accessdirectory and the TIFF preservation derivatives have been moved to themanualNormalization/preservationdirectory.Note that the filenames must match in order for Archivematica to recognize the links between the original file and its derivatives.
Place the transfer in your transfer source location and start a Standard transfer as usual. For instructions, see the Transfer and Ingest documentation.
When you reach the normalization microservice on the Ingest tab, choose whether to normalize for access, preservation, or both.
Note
If you choose to review normalization results prior to accepting, you will find your
manualNormalizationfolder and its contents in the objects directory of your transfer, with itsaccessand/orpreservationfolders and their content intact.Once the AIP is created, you will find that the originals and their preservation derivatives are now located in the
datadirectory of the AIP as usual. Note that themanualNormalizationdirectory and subfolders were deleted once normalization was complete. If you chose to normalize for access, a DIP will be created as well.
Important
Note that while there needs to be a one-to-one relationship between an original and its derivatives, it is not required that every original have a corresponding number of derivatives. A structure like this would work just as well:
my-manually-normalized-material/
├── manualNormalization
│   └── access
│       └── pepperbox-poppy.gif
│   └── preservation
│       ├── hooded-pitcher-plant.tif
│       └── pepperbox-poppy.tif
├── hooded-pitcher-plant.png
├── ornamental-onion.png
└── pepperbox-poppy.png
In a transfer like the above, Archivematica will fill in any gaps as per the
selected normalization option. For example, if the user selects “Normalize
for preservation”, then a preservation derivative for
ornamental-onion.png will be created by Archivematica.
Workflow 2: Manual normalization during Ingest
This workflow assumes that users have created access and/or preservation copies of their files while the material is being processed by Archivematica. For example, during processing the user might decide that the material needs to be normalized in a specialized way (for example, using proprietary tools).
This workflow requires that a user start a transfer in Archivematica, then use external normalization tools to create the required derivatives, manually place the derivatives within the currently processing directory on disk, and then return to Archivematica to proceed.
Create a transfer directory and place the original files inside at the top level.
my-manually-normalized-material/
├── hooded-pitcher-plant.png
├── ornamental-onion.png
└── pepperbox-poppy.png
Place the transfer in your transfer source location and start a Standard transfer as usual. For instructions, see the Transfer and Ingest documentation.
When you reach the normalization microservice on the Ingest tab, choose Normalize manually from the dropdown menu.
Manually normalize your files.
Using an SFTP file browser or SSH in your command line, go to your pipeline’s Processing Location and find the approveNormalization watched directory. The default location is
/var/archivematica/sharedDirectory/watchedDirectories/approveNormalization/preservation/, which will contain your transfer directory. You may need to look at your Storage Service configuration to confirm the Processing Location defined for your pipeline.Copy your manually normalized derivatives into your transfer directory. You will need to create a directory structure containing a
manualNormalizationdirectory. Inside of themanualNormalizationdirectory, create directories calledaccessandpreservation(you do not need both - if you only have preservation copies, create only thepreservationdirectory, and vice versa). Place your manually normalized files in the appropriate directory.my-manually-normalized-material/ ├── manualNormalization │ └── access │ └── pepperbox-poppy.gif │ └── preservation │ ├── hooded-pitcher-plant.tif │ └── pepperbox-poppy.tif ├── hooded-pitcher-plant.png ├── ornamental-onion.png └── pepperbox-poppy.png
In the above example, preservation and access derivatives were created for
pepperbox-poppy.png, while only a preservation copy was created forhooded-pitcher-plant.png.Note that the filenames must match in order for Archivematica to recognize the links between the original file and its derivatives.
Return to the dashboard and approve normalization.
Once the AIP is created, you will find that the originals and their preservation derivatives are now located in the
datadirectory of the AIP as usual. Note that themanualNormalizationdirectory and subfolders were deleted once normalization was complete. If you had access copies, a DIP will be created as well.
Adding PREMIS eventDetail for manual normalization
When Archivematica carries out normalization, a PREMIS event is created and added to the METS that describes the normalization event. However, when you manually normalize material, Archivematica does not create a PREMIS event. This feature allows you to write a PREMIS event for manually normalized materials.
Regardless of whether you include manually normalized files in the initial transfer (Workflow 1) or during processing (Workflow 2), the procedure for adding PREMIS eventDetail is the same.
Note
If you want to add a manual normalization PREMIS event, it is helpful to set “Reminder: add metadata if desired” to None in your processing configuration so that you do not miss the window of opportunity. Once the SIP has passed this microservice, you can no longer add the PREMIS event.
Follow the steps in Workflow 1 or 2, above.
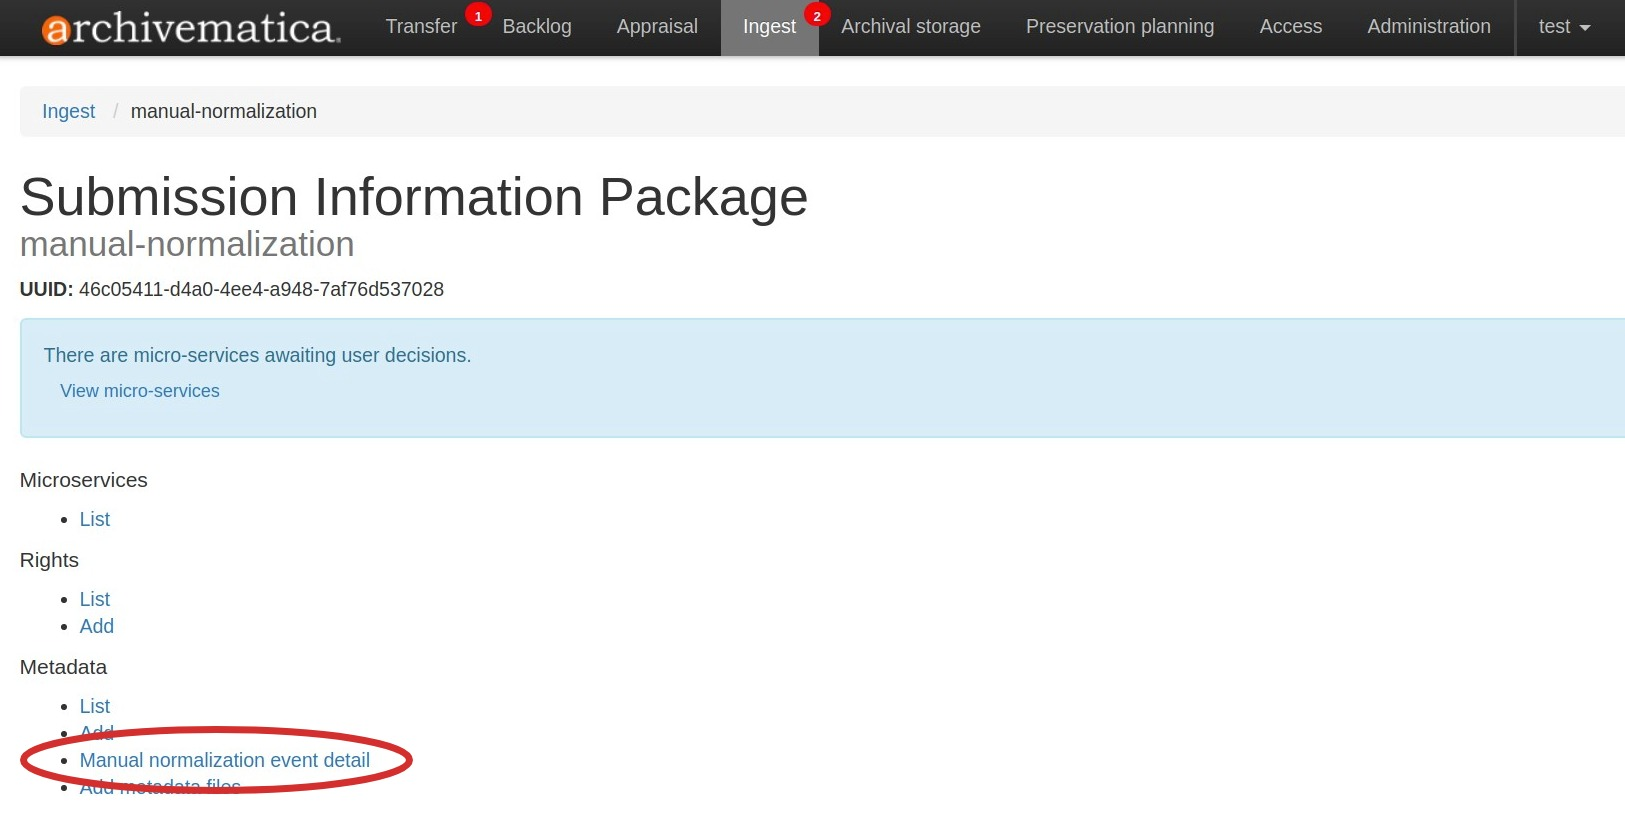
After normalization is approved, Archivematica will stop and remind you to add metadata. Click on the metadata icon.

Select “Manual normalization event detail” under metadata.
Add event detail. This might be technical tool output, like:
program=ImageMagick; version=6.6.4.0; command=%convertPath% %fileFullName%
+compress %preservationFileDirectory%%fileTitle%.%preservationFormat%
or something more narrative like in the example below.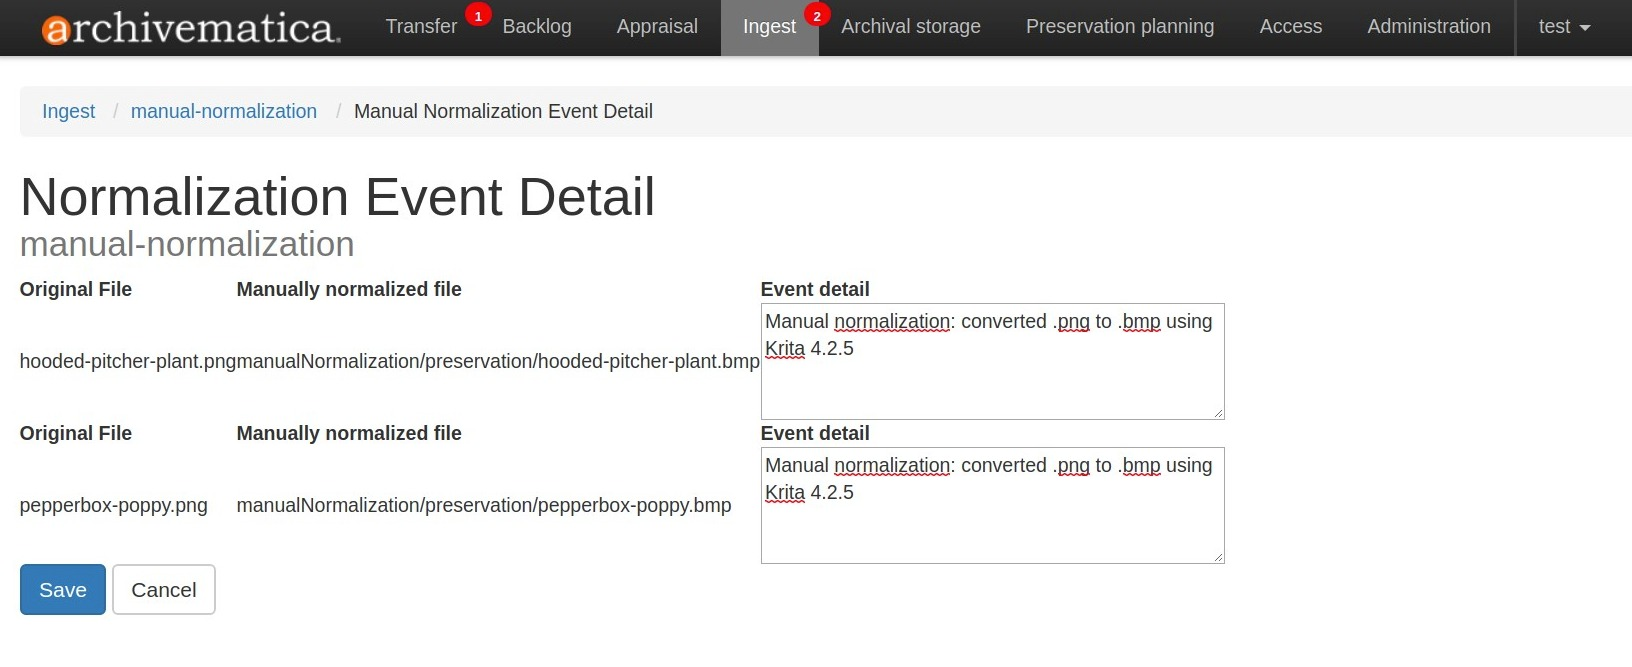
Save the metadata and click on the ingest tab to continue processing.
Select Continue from the metadata reminder dropdown box to continue processing.
Normalizing files with the same name
The manual normalization workflow outlined above assumes that there are no
conflicts between filenames. For example, if the original filenames are
file1.doc and file2.xls, there is no conflict. But if you are manually
normalizing both file1.doc and file1.xls, even if the extensions of the
normalized files are different, you will need to provide a CSV file to document
the relationships between the original and normalized files.
Create your directory structure.
manually-normalized-duplicate-names/
├── manualNormalization
│   └── access
│       ├── file1.jpg
│       └── file1.pdf
│   └── preservation
│       ├── file1.pdf
│       └── file1.tif
├── file1.crw
├── file1.doc
└── file1.tga
In the example above,
file1.tgahas a JPG access derivative and a TIFF preservation derivative.file1.dochas PDF access and preservation derivatives.file1.crwdoes not have any derivatives.Create a CSV file called
normalization.csv. The CSV must contain three columns: the path of the original file, the path of the access derivative, and the path of the preservation derivative. All the files with duplicate names need to be listed, even if they do not have manually normalized derivatives.file1.tga manualNormalization/access/file1.jpg manualNormalization/preservation/file1.tif file1.doc manualNormalization/access/file1.pdf manualNormalization/preservation/sfile1.pdf file1.crw Important
normalization.csvis case-sensitive. Ensure that file paths are exact. Do not include column headers.Include the CSV file at the top level of your transfer.
manually-normalized-duplicate-names/
├── manualNormalization
│   └── access
│       ├── file1.jpg
│       └── file1.pdf
│   └── preservation
│       ├── file1.pdf
│       └── file1.tif
├── file1.crw
├── file1.doc
├── file1.tga
└── normalization.csv
Transfer as per Workflow 1 or 2, above.
In the example above, there are manually normalized files for both preservation and access, however it is possible to have manually normalized files for only access or preservation by leaving the appropriate column blank.
Other scenarios are also possible:
Original file not in a subdirectory, normalized copies are:
file1.tga,manualNormalization/access/subdir1/file1.jpg,manualNormalization/preservation/subdir1/file1.tif
file1.doc,manualNormalization/access/subdir1/file1.pdf,manualNormalization/preservation/subdir1/file1.pdf
Only some normalized copies in a subdirectory:
file1.tga,manualNormalization/access/subdir1/file1.jpg,manualNormalization/preservation/subdir1/file1.tif
file1.doc,manualNormalization/access/file1.pdf,manualNormalization/preservation/subdir1/file1.pdf
Subdirectories used only to distinguish file names:
file1.tga,manualNormalization/access/subdir1/file1.jpg,manualNormalization/preservation/subdir1/file1.tif
file1.ppm,manualNormalization/access/subdir2/file1.jpg,manualNormalization/preservation/subdir2/file1.tif
Note
If the filenames contain characters that Archivematica’s toolset cannot handle, Archivematica will change the filenames by replacing the character with the nearest equivalent (see Filename changes for more information.) The normalization.csv file will work with either the original filenames or the changed filenames.
Archivematica 1.12.2
Contents
Search
Open the general index or type your search in the search box.
Available projects
Archivematica
- Version 1.18.0 (stable-current)
- Version 1.17.1 (stable-previous)
- Version 1.16.0 (legacy)
- Version 1.15.1 (legacy)
- Version 1.14.1 (legacy)
- Version 1.13.2 (legacy)
- Version 1.12.2 (legacy)
- Version 1.11.2 (legacy)
- Version 1.10.2 (legacy)
- Version 1.9.3 (legacy)
- Version 1.8.1 (legacy)
- Version 1.7.2 (legacy)
- Version 1.6.1 (legacy)
- Version 1.5 (legacy)
- Version 1.4 (legacy)
Archivematica Storage Service
- Version 0.24.0 (stable-current)
- Version 0.23.0 (stable-previous)
- Version 0.22.0 (legacy)
- Version 0.21.1 (legacy)
- Version 0.20.1 (legacy)
- Version 0.19.0 (legacy)
- Version 0.18.1 (legacy)
- Version 0.17.1 (legacy)
- Version 0.16.1 (legacy)
- Version 0.15.1 (legacy)
- Version 0.14.1 (legacy)
- Version 0.13.0 (legacy)
- Version 0.12.0 (legacy)
- Version 0.11.1 (legacy)
- Version 0.10 (legacy)
- Version 0.9 (legacy)
- Version 0.8 (legacy)
License
Archivematica documentation by Artefactual Systems Inc. is licensed under a Creative Commons Attribution-ShareAlike 4.0 International License.
