Appraisal
The Appraisal tab provides an opportunity for users to appraise and analyze the files included in a transfer. The Appraisal tab includes features for examining the characteristics and contents of the files, allows users to connect files to finding aids created in ArchivesSpace, and lets users decide which files from a transfer should be added to a SIP and how these files should be arranged within the SIP.
In order to use the Appraisal tab, you must send the transfer to the backlog when you reach the end of the Transfer tab microservices.
Note
If you are running Archivematica without Elasticsearch or with limited Elasticsearch functionality, the Appraisal tab may not appear in your dashboard.
On this page:
Backlog
Transfers that have been sent to the backlog can be found in the Backlog pane of the Appraisal tab. You can see everything in the backlog by doing a blank search using the search boxes at the top of the page, or narrow your search by entering search terms and parameters.
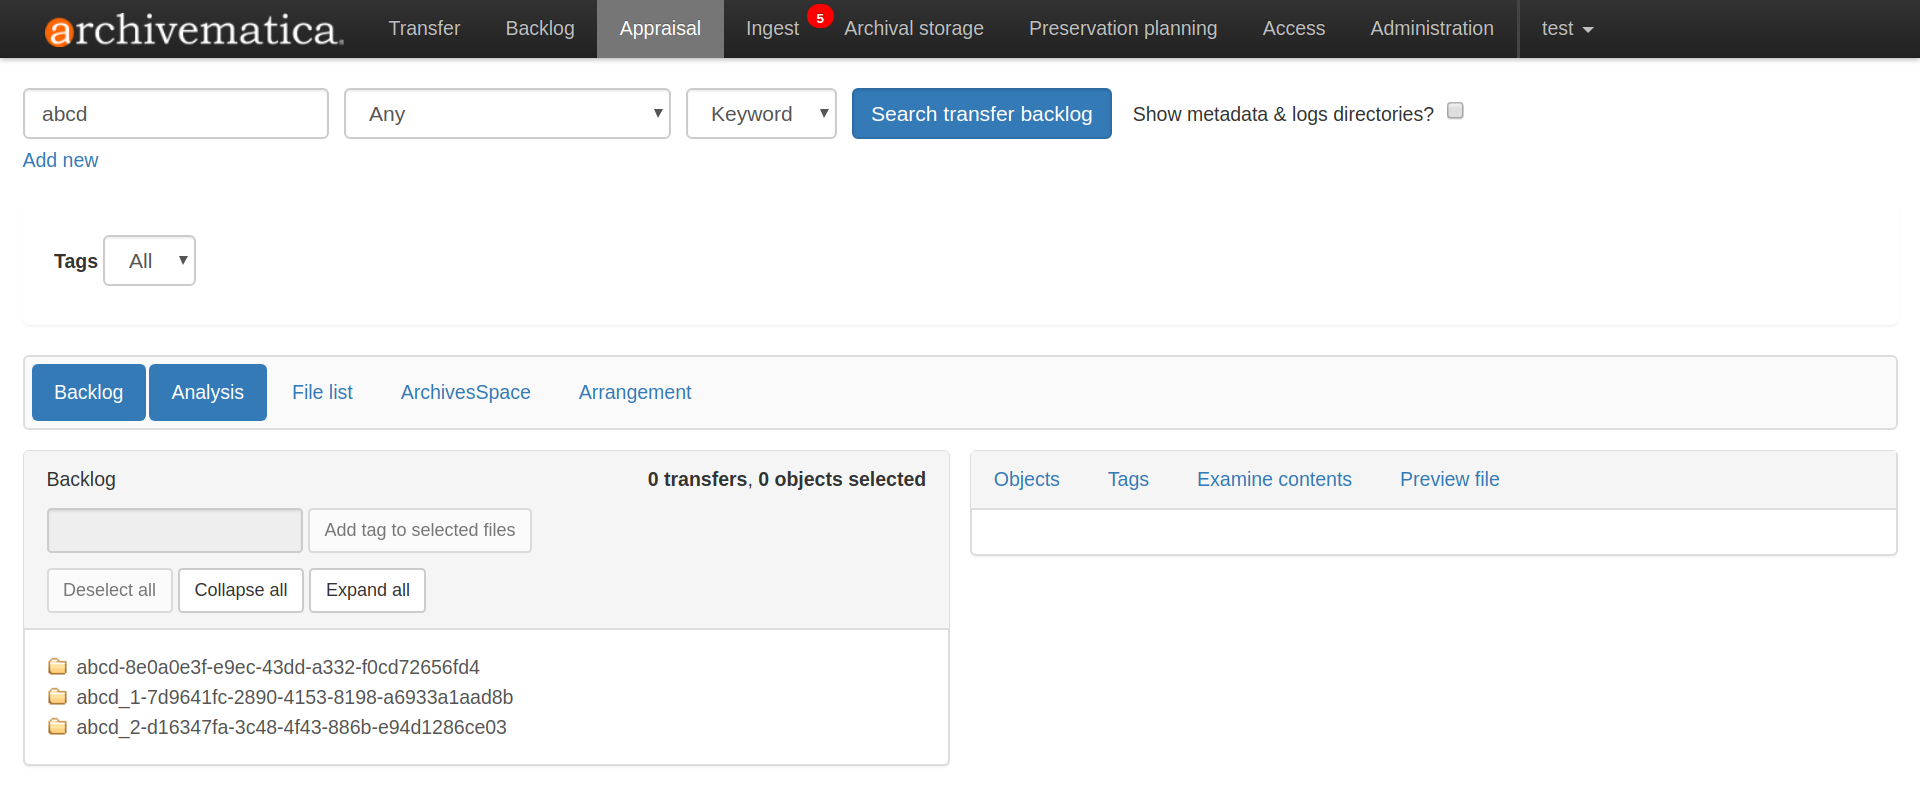
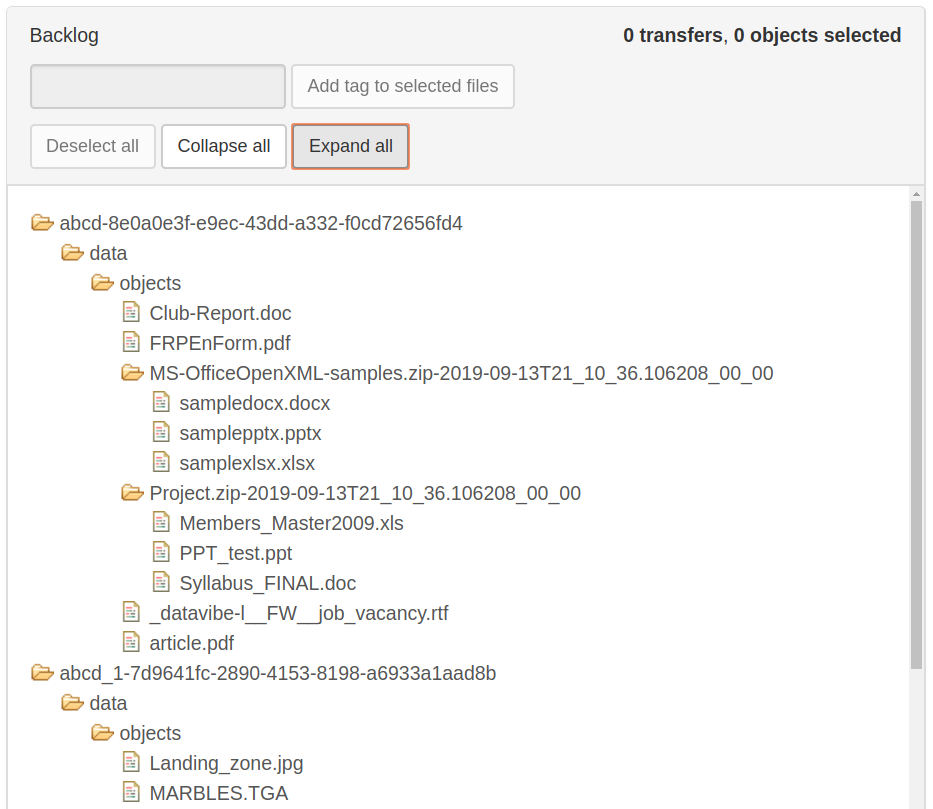
The Backlog pane will display a list of transfer names. You can expand each one by clicking on the yellow folder icon, or by selecting Expand all. Click on Collapse all to collapse all open folders.
Tick Show metadata & logs directory to the right of the search boxes to include metadata and log files in the search results, if you wish.
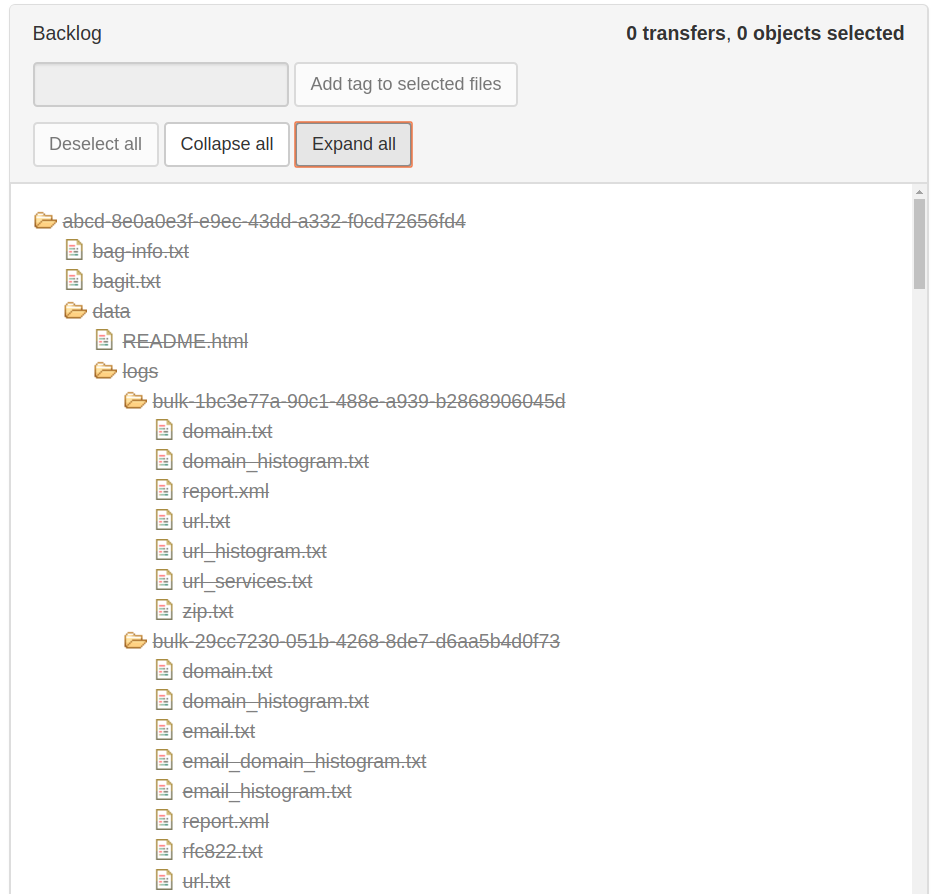
There are two reasons that files may be shown greyed out and with a strikethrough:
- The file is a metadata or log file and therefore cannot be manipulated by the user.
- The file has already been arranged into a SIP and therefore it no longer exists in the backlog - the entry is being maintained in the backlog pane for context.
Tagging files
The Backlog pane allows users to add a tag to a file in order to aid in appraisal. The tag is not recorded in any way and does not persist beyond the Appraisal tab.
Select one or more files in the Backlog pane by clicking on the file name. If you would like to add the tag to all of the files in a directory, select the directory name.
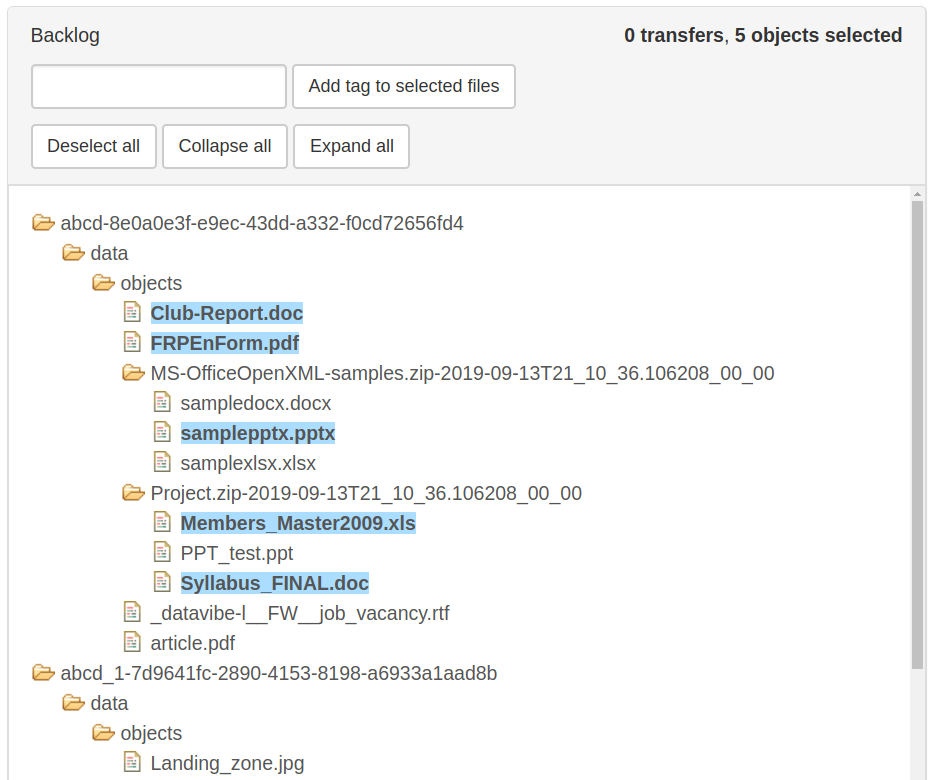
Enter the tag name in the text box and select Add tag to selected files.
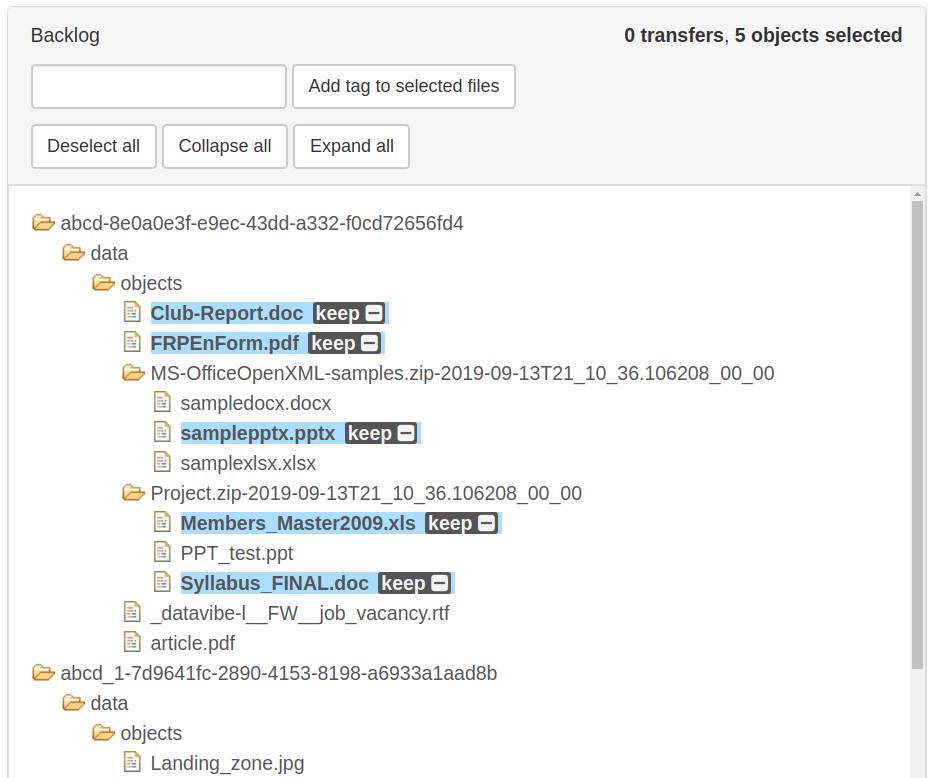
To remove a tag, click on the minus sign next to the tag name.
Once you have created a tag, you can filter your search results to only show files that have been tagged by selecting your tag from the Tags dropdown below the search boxes at the top of the Appraisal page.

Tags can also be added in the File list pane.
Analysis
The Analysis pane allows the user to analyse transfer materials in bulk as well as individual files. Files selected in the Backlog pane populate the Analysis pane and can be analyzed using four tabs: Objects, Tags, Examine contents, and Preview file.
Objects
The Objects tab of the Analysis pane displays format and size information about selected files.
The Report view provides a list of information about the format, PRONOM unique identifier (PUID), format group, number of files, and size of the selected files.
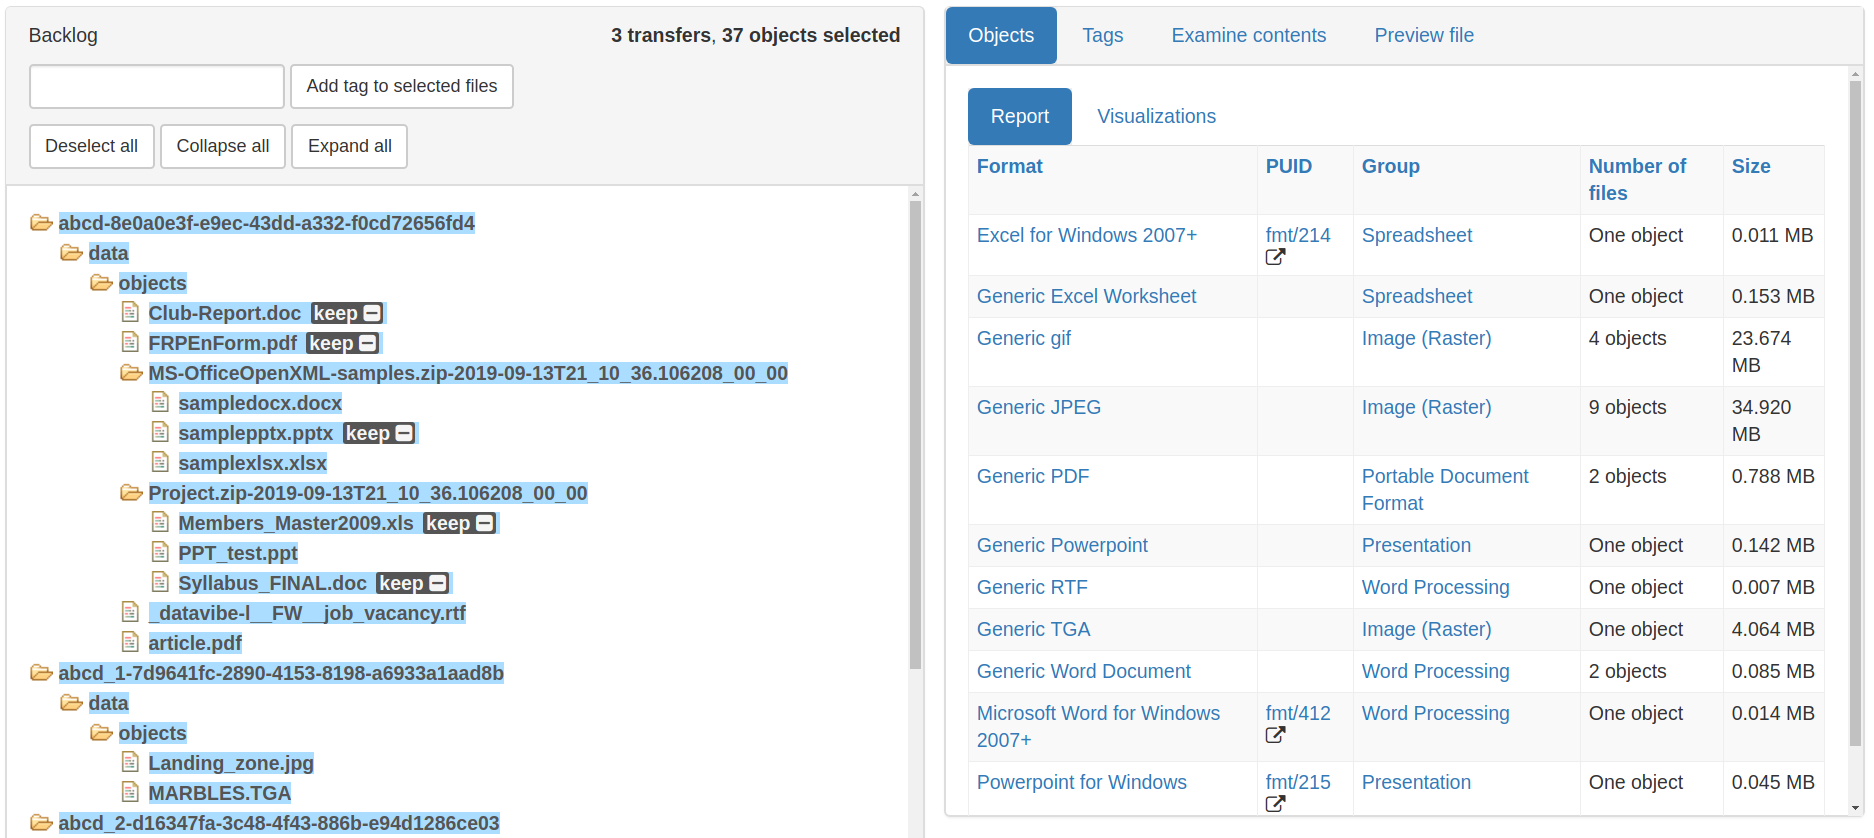
Report showing information about the files that have been selected in the Backlog pane.
The Visualizations view provides two visualization options: the total number of files for each format, or the total size of files for each format.
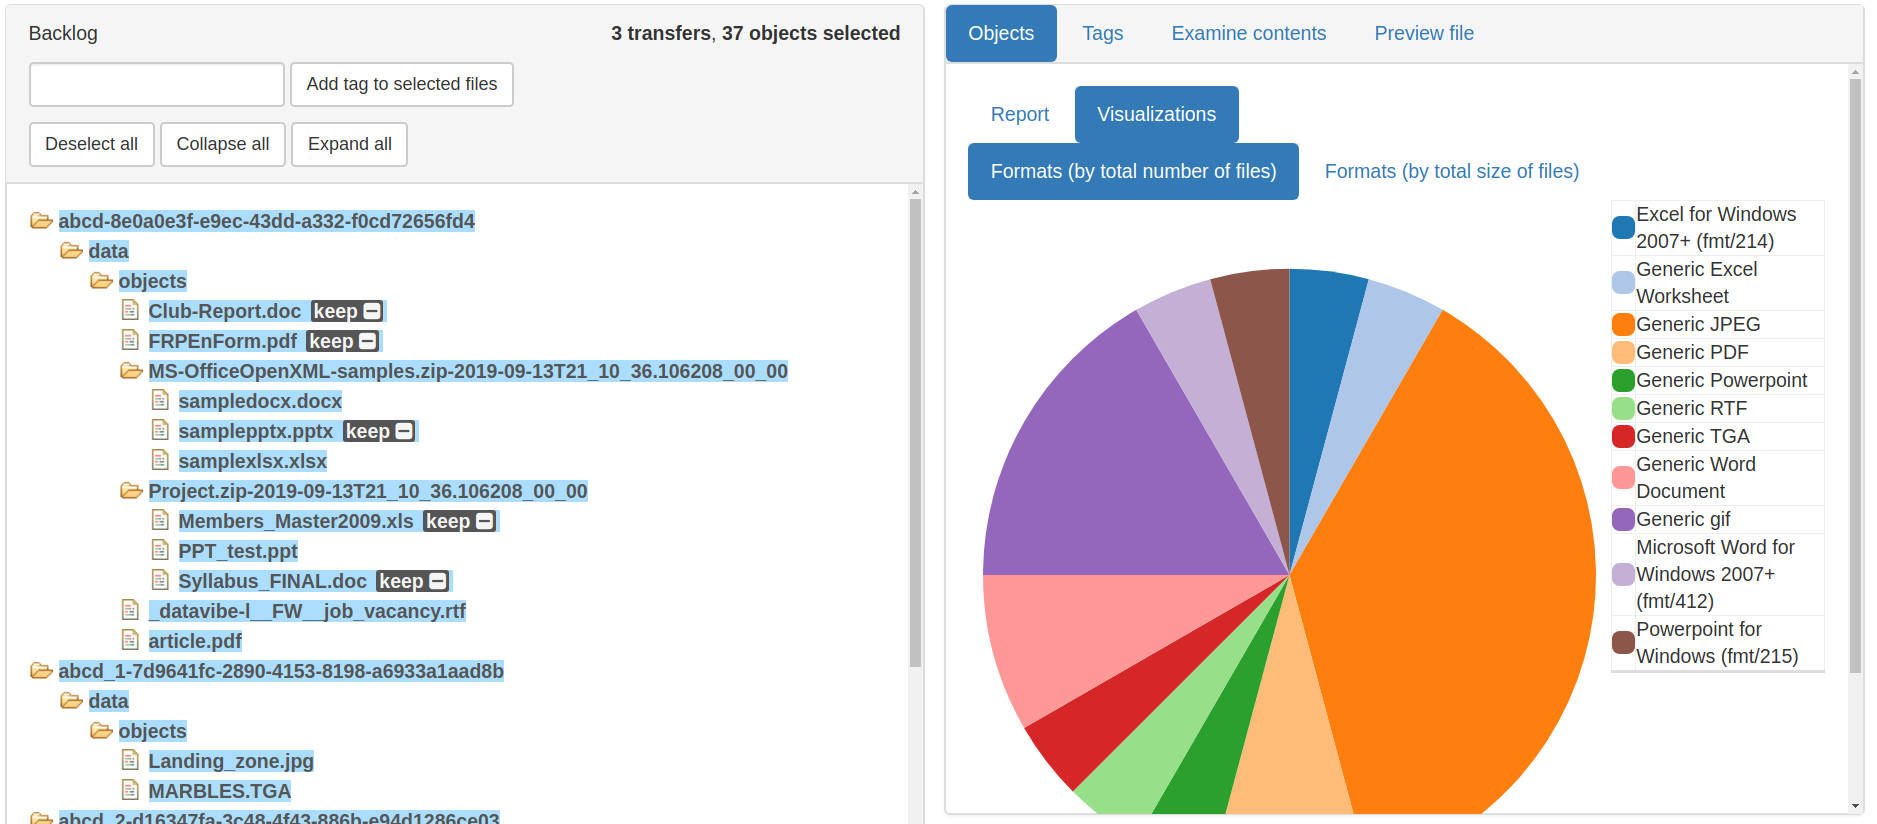
Visualization showing total number of each format for the selected files
Files listed in Analysis can also be filtered by Format, PUID, and Group through selecting values for these facets in the Report view. For instance, if the user clicks on the Group “Portable Document Format” listed for one of the files, this filter is added and only PDF files remain listed in the Analysis pane. Filters appear under the Tags drop-down menu and can be removed by clicking the “x” beside the name.
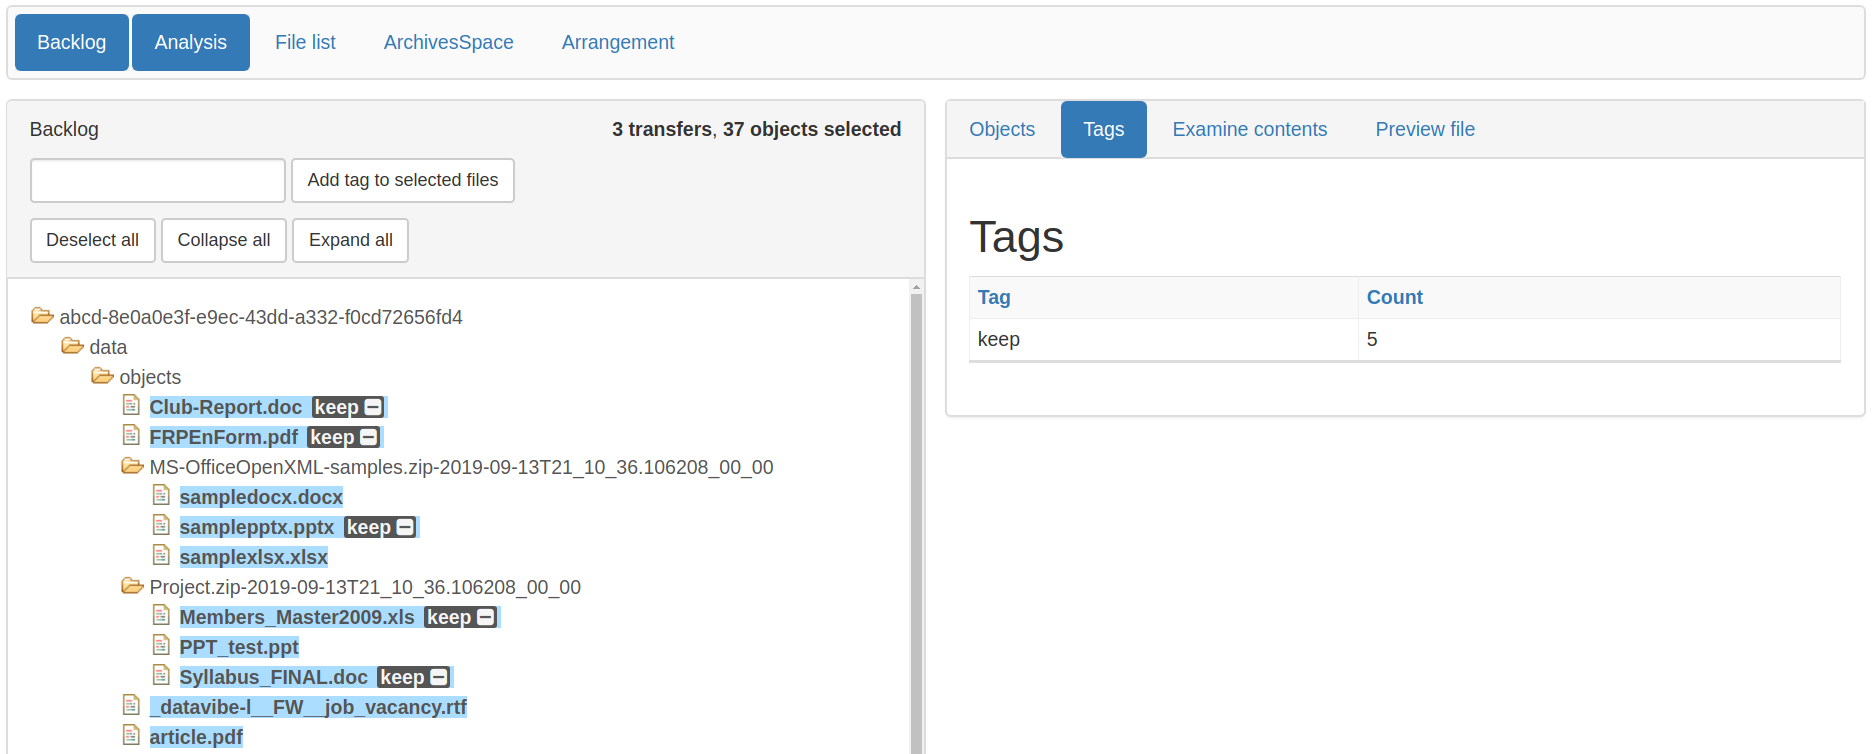
Tags
The Tags tab lists any tags that have been added and how many files with each tag are present in the selected files.
Examine contents
During the Transfer process, users can choose whether or not to Examine contents. This is a microservice that runs the tool Bulk Extractor, a forensics tool that scans the contents of a file to look for useful information. Bulk Extractor looks for many different patterns, such as social security numbers, credit card numbers, postal addresses, and email addresses.
On the Examine contents tab of the Analysis pane, users can review transfers to see if any of the files contain PII (personally identifying information, or more specifically American social security numbers) or credit card numbers.
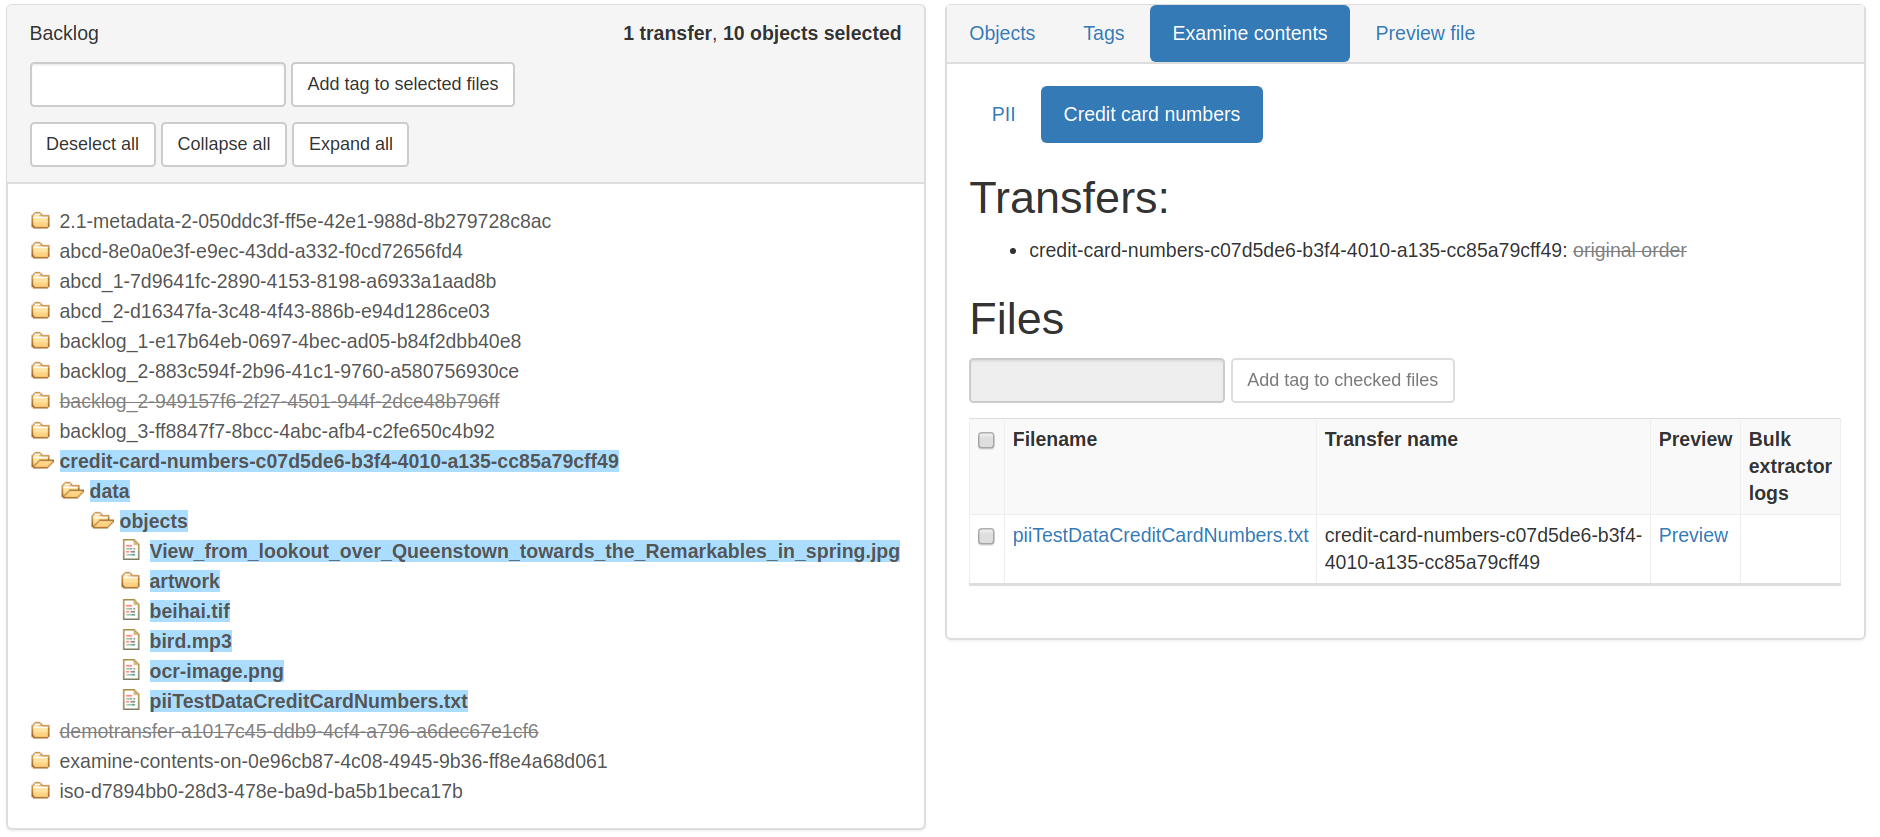
This transfer contains a file that may include credit card numbers.
Selecting the file name will show a preview of the data.
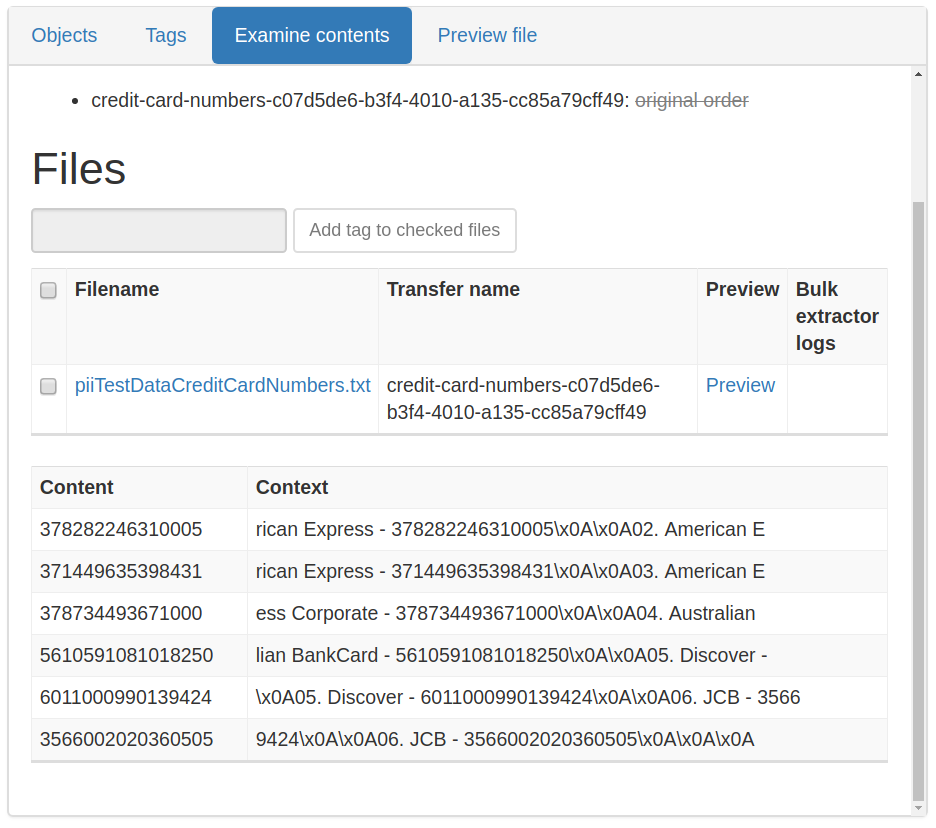
The file clearly contains credit card data, with the credit card number shown in the “Content” column and the context for the number shown in the “Context” column.
Clicking on Preview will display the file in the Preview file tab, if possible (see Preview file, below).
You can also add tags to files containing sensitive information by selecting the checkbox next to the file name, adding a tag to the text box, and clicking Add tag to checked files. The tag will appear attached to the file in the Backlog pane.
Note
More Bulk Extractor data can be reviewed by downloading the transfer from the Backlog tab.
Preview file
The Preview file pane allows users to take a look at a file without having to download it to their computer. The preview window only works for files that can be rendered in a browser - for example, JPEG images or MP3 audio files.
To preview a file, you must select it from the File list pane.
- In the Backlog pane, select the file, or directory of files, that you would like to view.
- Open the Analysis pane and click on the Preview file tab.
- In the File list pane, select the file that you would like to preview. Image files will be displayed in the window; audio and video files will be displayed in a media player.
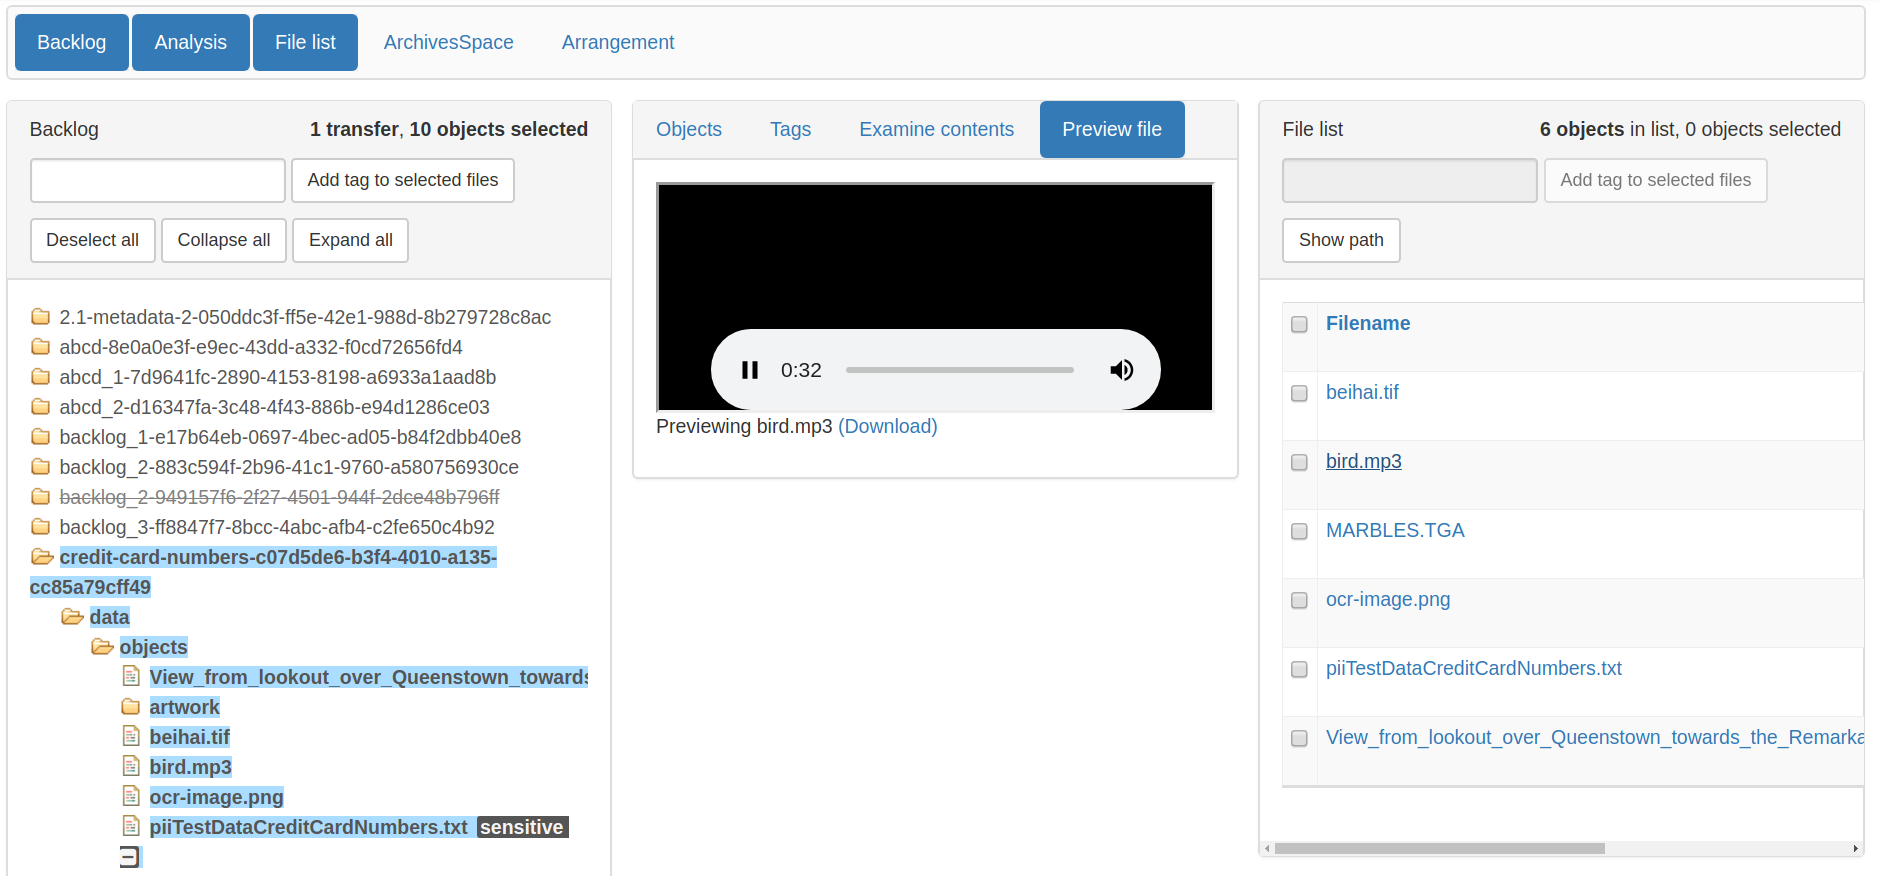
The file bird.mp3 being played in the Preview file tab.
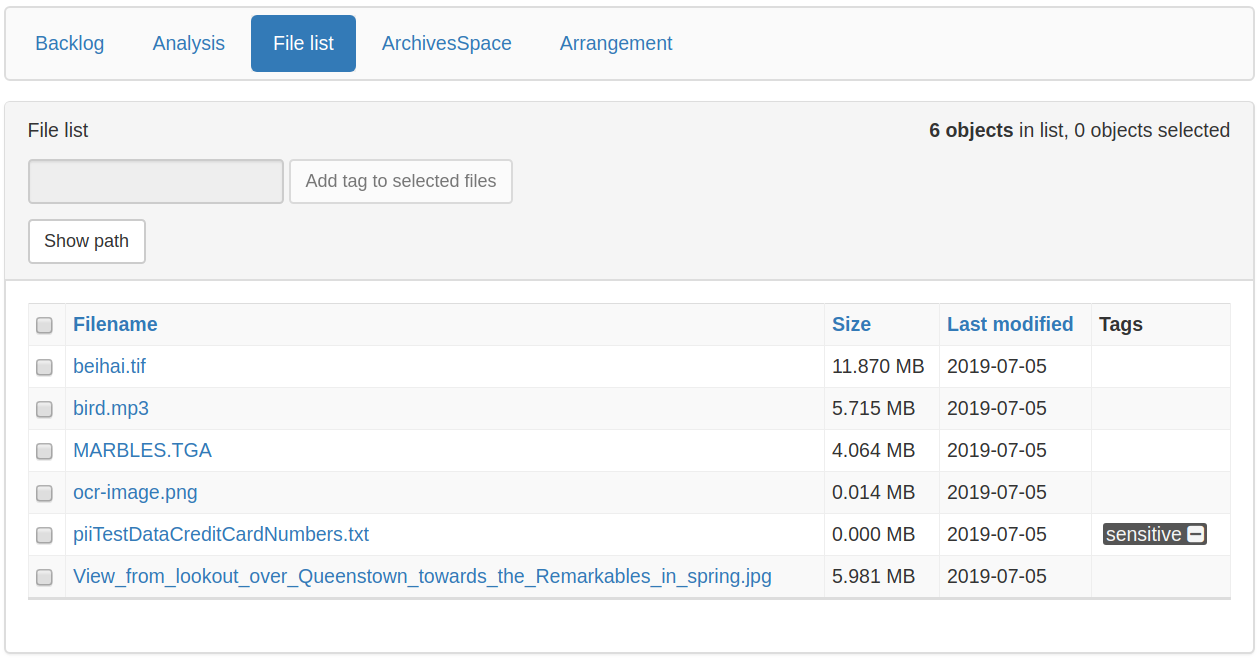
File list
The File list pane is populated by selecting files in the Backlog pane. File list provides information about the filenames, sizes, dates files were last modified (if available), and any tags that have been added to the selected files.
Any filters that have been applied in the Analysis pane or through the Tags drop-down menu will affect what files appear in File list.
You can sort the file list by clicking on the filename, size, or last modified column headers.
You can add tags to files on the File list pane by selecting the checkbox next to the file name, adding a tag to the text box, and clicking Add tag to selected files. The tag will appear attached to the file in the Backlog pane and in the Tags column on the File list pane. Click on the minus sign next to the tag name to remove the tag.
Clicking on the name of the file will allow you to view the file, if possible, in the Preview file tab of the Analysis pane.
You can also toggle the full file path on and off by clicking on Show path.
ArchivesSpace
The ArchivesSpace pane in the Appraisal tab allow users to view ArchivesSpace resources, add new child records and digital objects, and edit the resource metadata. Materials that have been transferred into Archivematica can be associated with resources created in ArchivesSpace. Arranging materials in the ArchivesSpace pane results in a SIP that contains the materials connected to the ArchivesSpace resouces.
To enable the ArchivesSpace integration, connect your ArchivesSpace instance to Archivematica by adding credentials to the ArchivesSpace DIP upload section of the Administration tab.
ArchivesSpace terms
- Resources: top-level descriptive metadata records or finding aids (for fonds, collections, record groups, etc.)
- Archival objects: lower-level description nested under resources (series, files, items, etc.)
- Digital objects: metadata about digital objects; can be associated with resources or archival objects at any level of description.
More information on ArchivesSpace can be found at https://archivesspace.org/.
Searching for ArchivesSpace resources
When you open the ArchivesSpace pane, it will not be populated. You can populate it with all resources by clicking on the Search ArchivesSpace button with the Title and Identifier fields left blank.
Using the search box at the top of the ArchivesSpace pane, you can limit your search results by the title or identifier of a resource.
Click on the caret (triangle) to expand and navigate through the resource’s hierarchy.
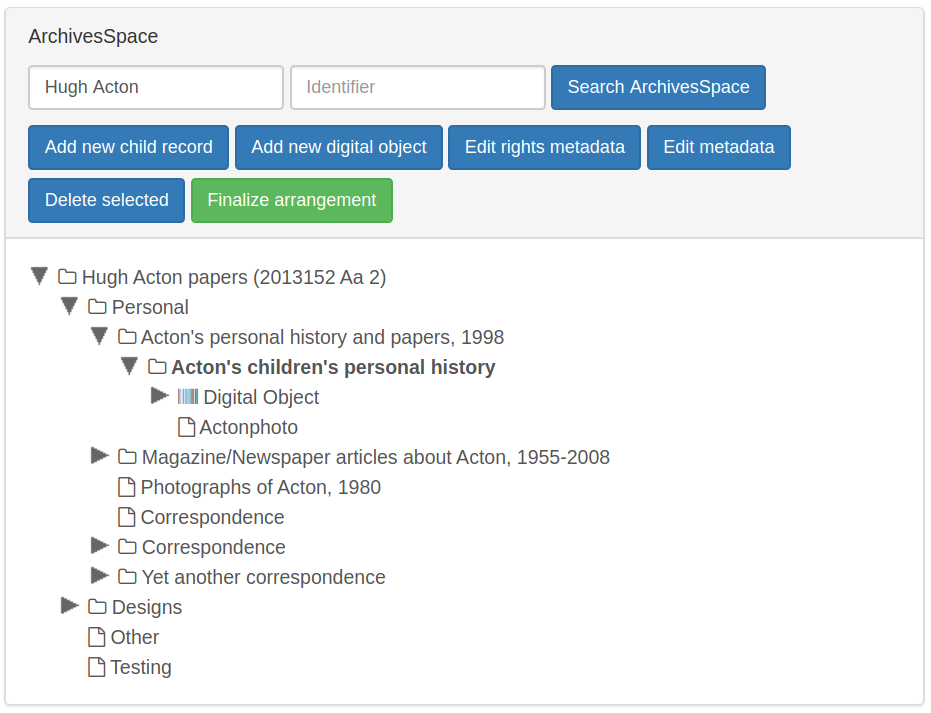
The folder icon indicates an ArchivesSpace resource or archival object that has a child record nested beneath it in the hierarchy.
The page icon indicates an ArchivesSpace resources and archival objects that does not have child record nested beneath it in the hierarchy.
Digital objects are designated by the parallel lines icon.
Note
Digital objects that were created in ArchivesSpace will not appear in the ArchivesSpace pane in Archivematica. Only digital objects added to a resource from within Archivematica are displayed.
Creating and editing archival objects
From the ArchivesSpace pane in Archivematica, users can add a new child archival object to any existing resource or archival object.
Navigate to the resource or archival object you would like to add a child archival object to and click on the name of the resource or archival object.
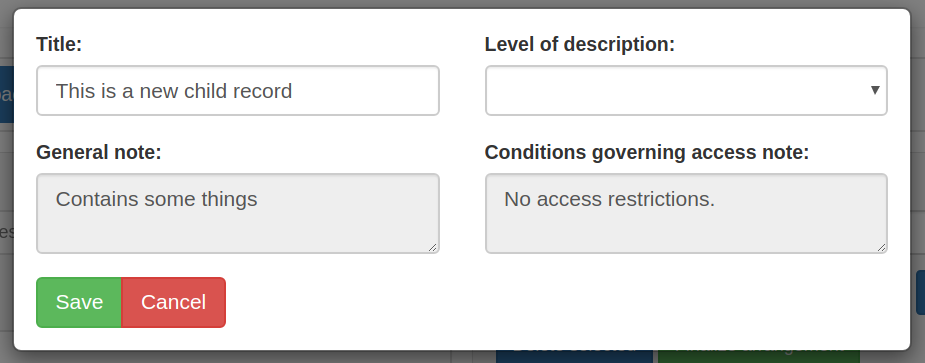
Click Add new child record. A metadata box will pop up where you can enter basic metadata for the record. At a minimum, the new archival object must have a title and a level of description.
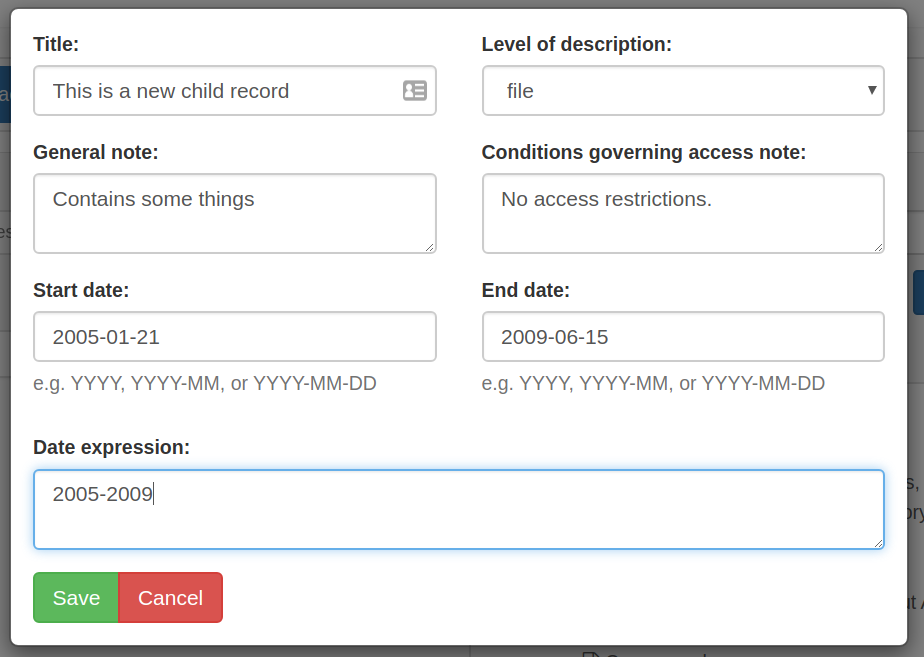
Click Save once you are satisfied with the metadata. The new child archival object will appear in the hierarchy, and will also be added to your ArchivesSpace repository.
To remove a resource or archival object, select the name of the resource or archival object and click Delete selected. Please note that this cannot be reversed, and that the deletion will happen in your ArchivesSpace repository as well.
To edit the title or level of description of a resource or archival object, select the name of the resource or archival object and click Edit metadata.
Adding rights metadata
You can add rights metadata to a resource or archival object using the ArchivesSpace pane in Archivematica. Archivematica uses PREMIS rights for rights metadata.
Important
Rights can only be added at the SIP level - that is, to the resource or archival object that will eventually become the SIP.
To add rights metadata to a resource or archival object, select the name of the resource or archival object and click Edit rights metadata. A new tab will open showing the metadata information page. Select Add under the Rights heading. This will open the first page of the rights metadata entry form.
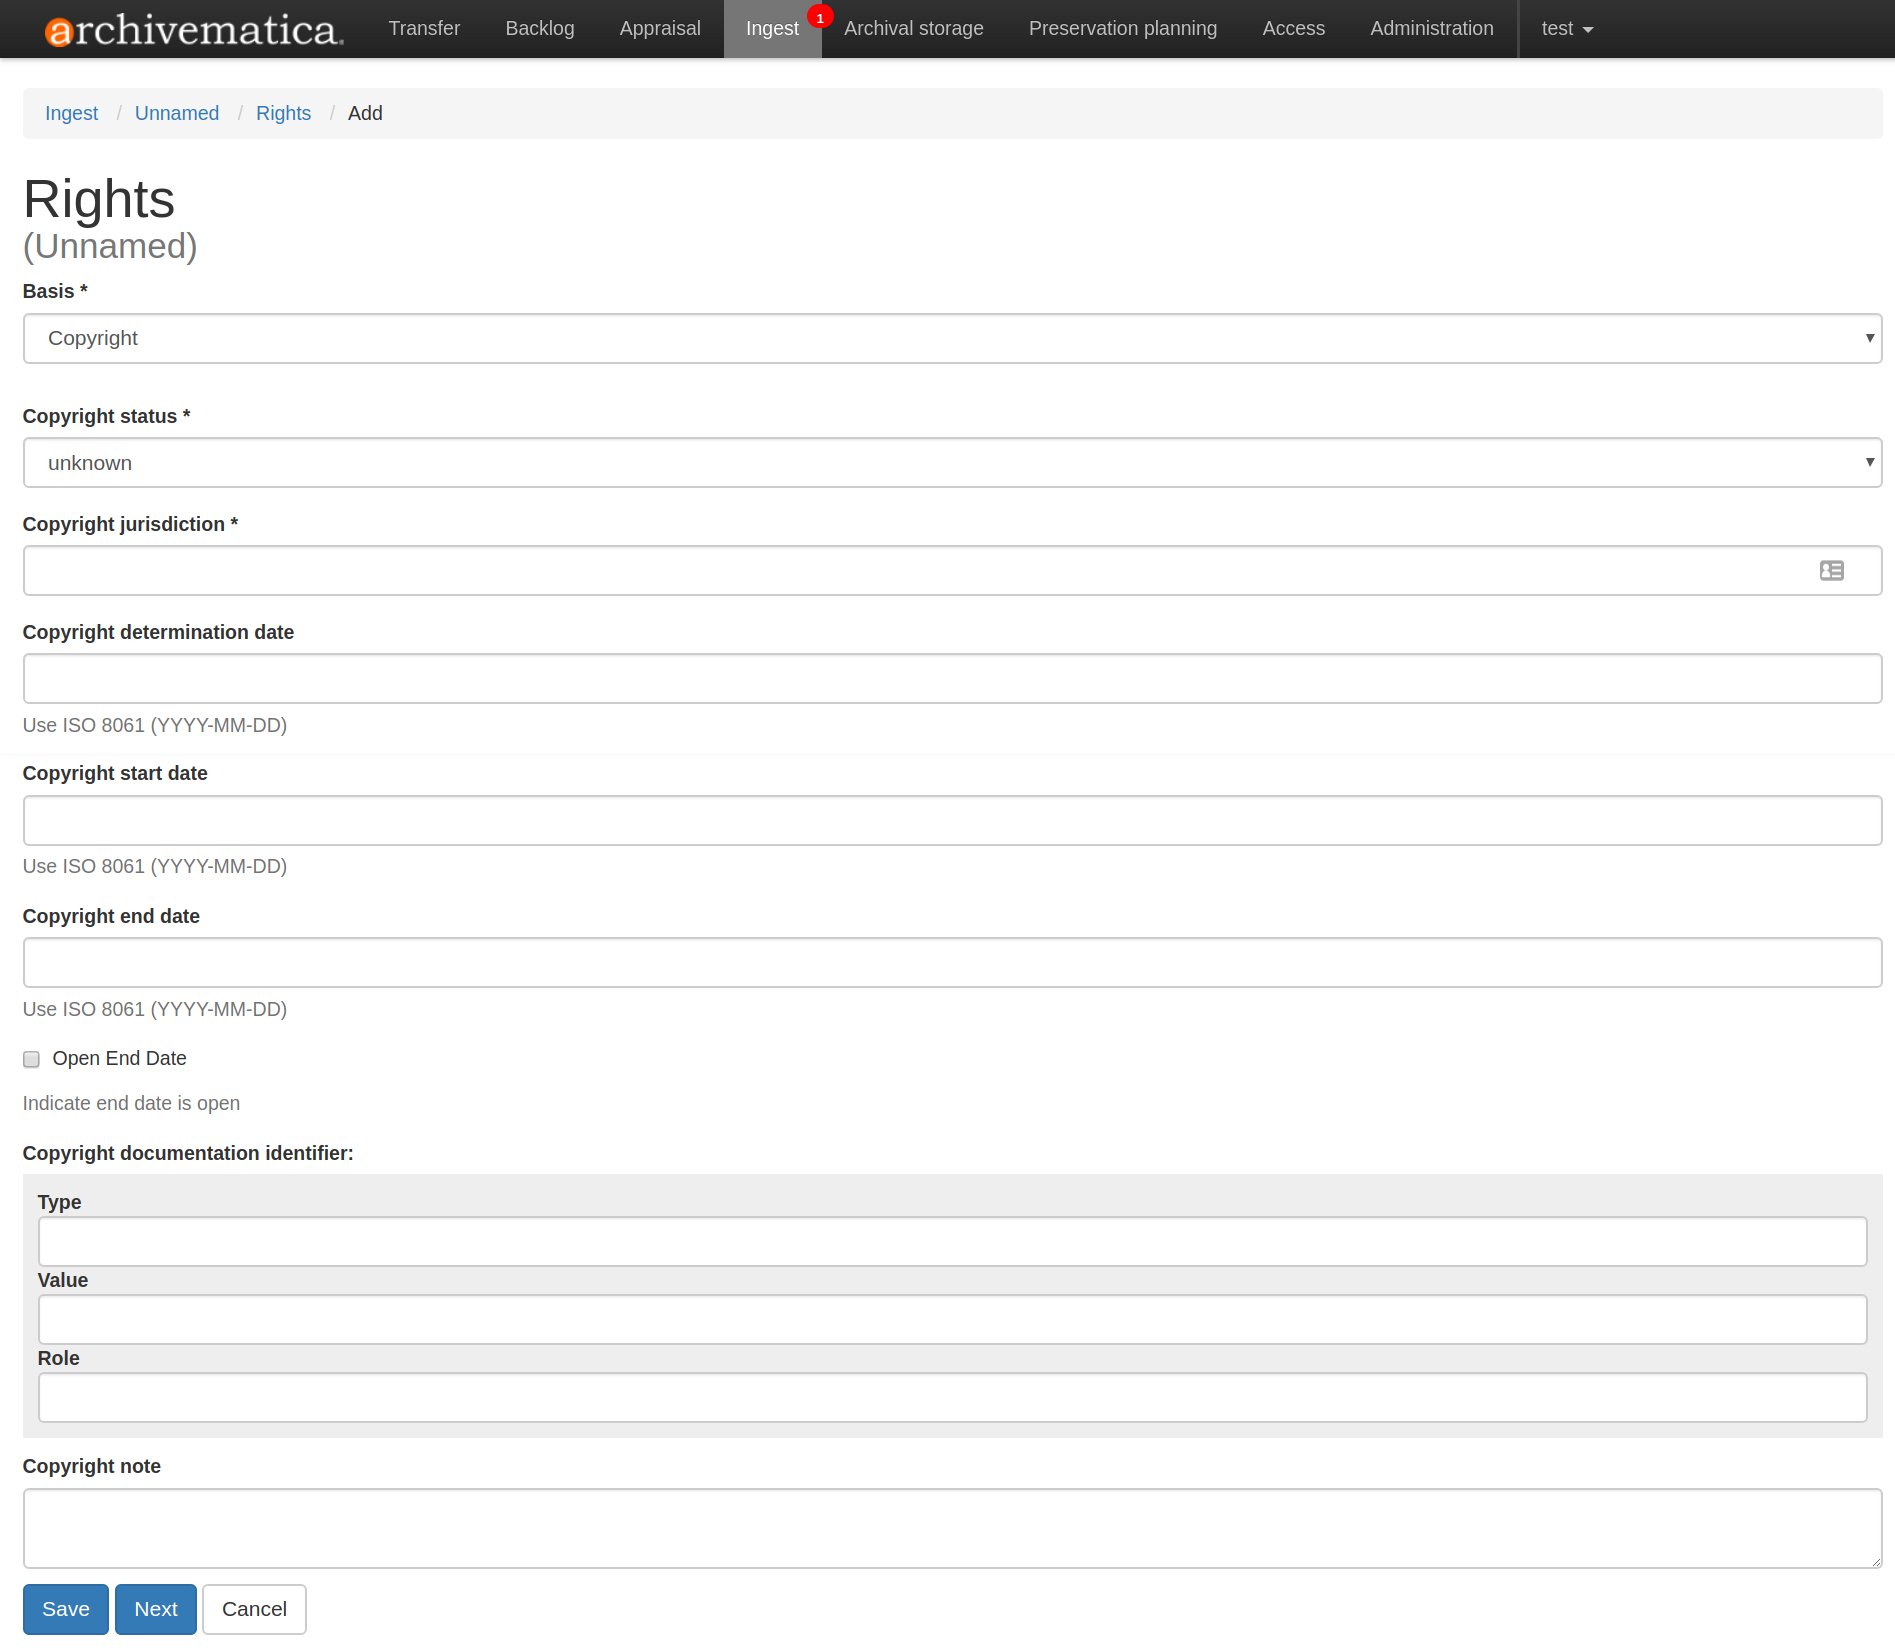
Add the rights basis information for the resource or archival object and click Save to save the data.
Click Next to add the rights act. Once you are done adding the act information, click Done.

Once you have saved your rights metadata, you can add another by selecting Add from the metadata information page again.
Connecting digital objects to ArchivesSpace resources
Materials that are stored in the backlog can be associated with ArchivesSpace resources by creating a digital object component and then dragging and dropping files from the Backlog pane to the new digital object component in the ArchivesSpace pane.
Note
Digital object components will not appear in the ArchivesSpace repository until the AIP for the digital object is stored.
Populate the Backlog pane by doing a blank search using the search boxes at the top of the page, or narrow your search by entering search terms and parameters.
Populate the ArchivesSpace pane by doing a blank search using the search boxes in the ArchivesSpace pane, or search by title or identifier of a resource. A hierarchical view of the ArchivesSpace resources will be displayed in the pane.
Select the name of the resource or archival object for which you would like to create a digital object component and click Add new digital object. A digital object record will appear as a child of the resource or archival object.
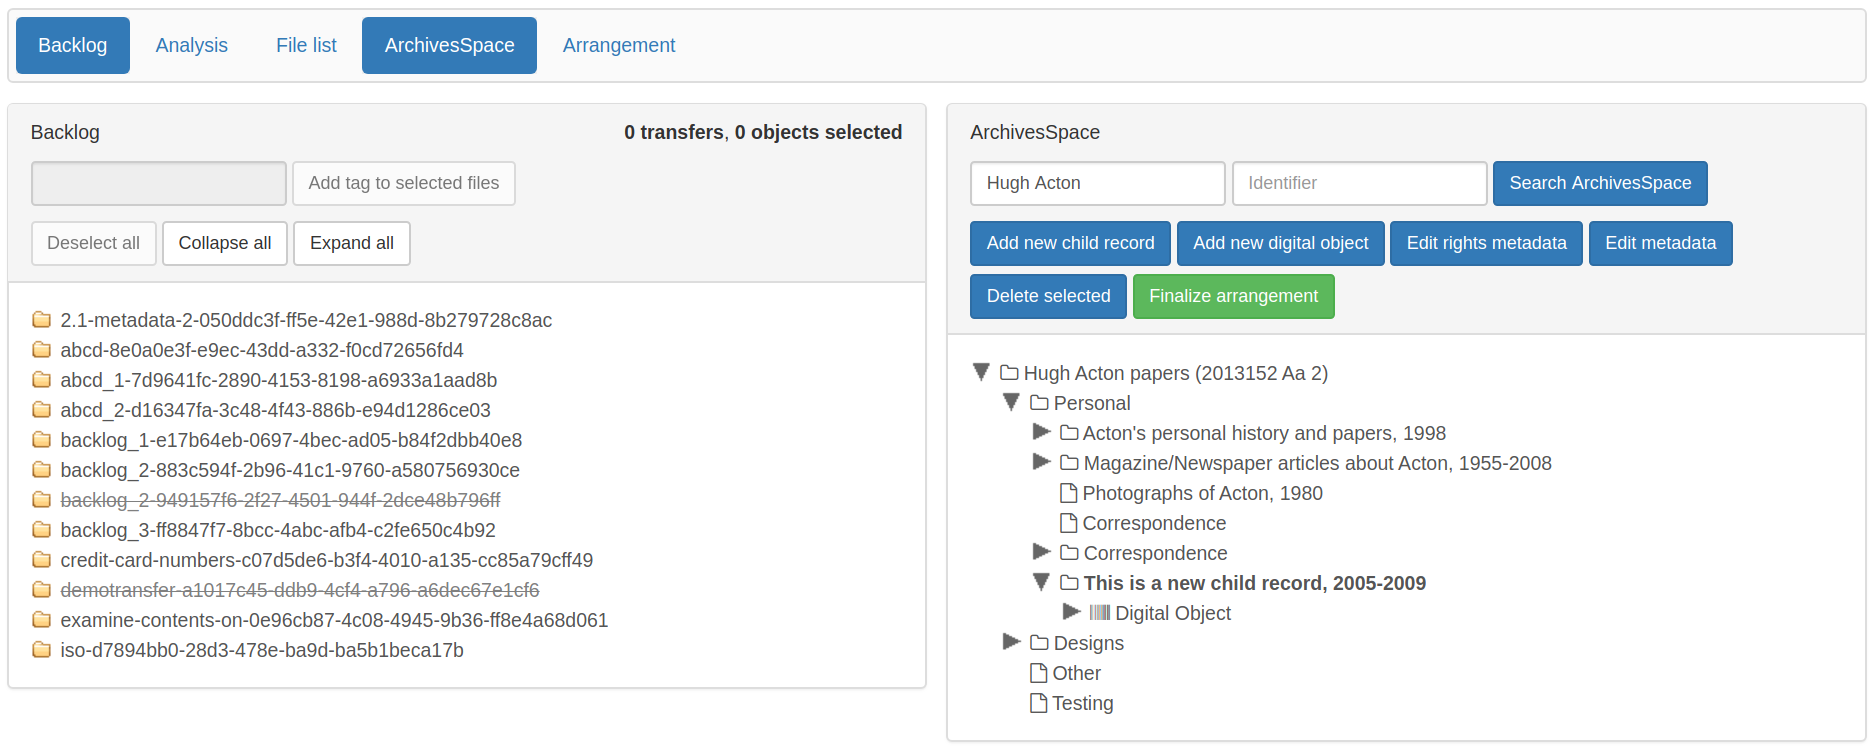
A new digital object has been added under the archival object titled “This is a new child record”.
From the Backlog pane, select a digital object and drag it over to the new digital object record in the ArchivesSpace pane. Only one file or directory from a transfer can be moved at a time. A file can only be added once to an ArchivesSpace resource. Repeat this step as many times as needed.
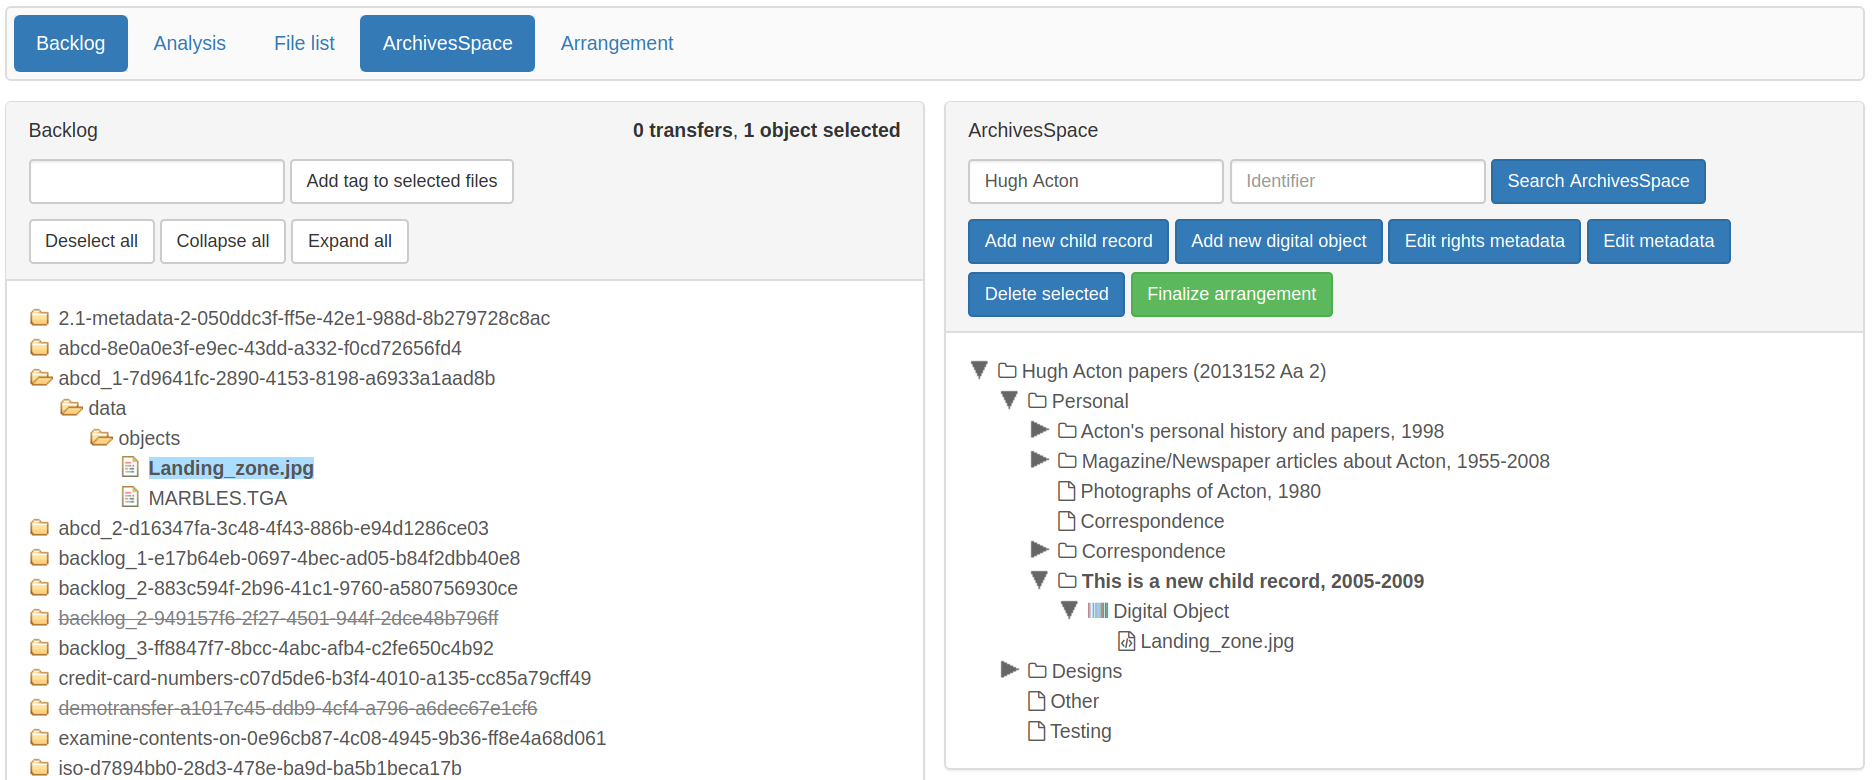
The file Landing_zone.jpg has been attached to the digital object record in the ArchivesSpace pane.
Once all files have been added and you are happy with the arrangement, select the name of the resource or archival object where materials have been arranged and click Finalize arrangement. This will start a SIP on the Ingest tab in Archivematica.
Tip
Before you start the SIP in the ArchivesSpace pane, verify that all required metadata associated with an ArchivesSpace resource is in place, particularly at the parent-level of the arrangement. In ArchivesSpace, verify that the description record is linked to an agent record.
Arrangement
The Arrangement pane allows users to organize materials stored in the backlog before turning the material into a SIP. The Arrangement pane allows users to combine material from multiple transfers into one SIP or, by only dragging and dropping selected files, weed the transfer so that the resulting SIP only includes the files that you would like to preserve.
Arranging materials through drag-and-drop
Populate the Backlog pane by doing a blank search using the search boxes at the top of the page, or narrow your search by entering search terms and parameters.
Note
Files with a strikethrough cannot be dragged over to the arrangement tab, either because the file is a metadata or log file that will be added to the SIP automatically or because the file has already been included in another SIP.
In the Arrangement pane, click on Add directory to create a structure for the SIP. Use the same button to create separate SIP directories or to create nested sub-directories. To create a sub-directory, select the name of the parent directory before clicking Add directory.
Drag and drop the transfer directory and/or individual objects you wish to arrange from the Backlog pane to the Arrangement pane. Note that all metadata, submission documentation, and other associated data is also copied to the arrange pane with your object(s).
Once all relevant files have been dragged from the Backlog pane to directories in the Arrangement pane, select the top-level directory corresponding to the intended SIP, and click Create SIP. This will start a SIP on the Ingest tab.
Once your arrangement is complete and the SIP has been turned into an AIP for long-term storage, you can delete any files remaining in the transfer that you would like to discard by follow the instructions to delete transfers on the Backlog tab.
Adding AtoM levels of description
If you plan to create a DIP to Upload to AtoM, you may wish to add levels of description to your directories and/or objects. Archivematica will add a logical structMAP to the METS file, which AtoM will use to create information objects, applying the chosen levels of description. Note that if you do not apply a level of description to a digital object, AtoM will automatically assign it the level of “item”.
This functionality is supported with AtoM 2.2 and higher.
Note
To have the AtoM levels of description appear, you must configure the AtoM integration in the Administration tab.
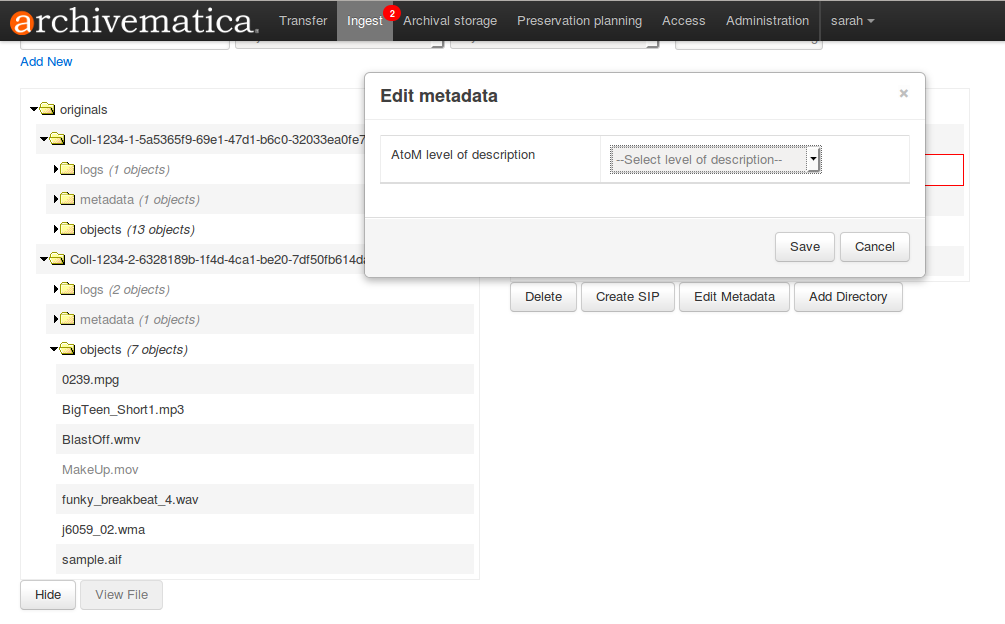
Select a directory or object in the Arrange pane. Click the Edit metadata button to choose the level of description.
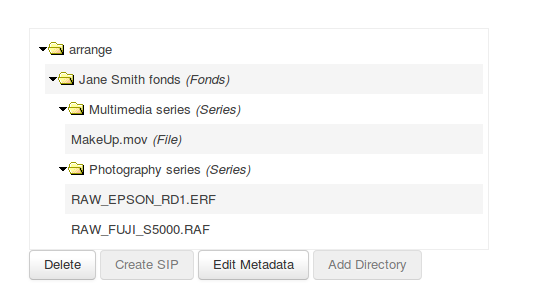
As you add levels of description they will be shown in the arrange pane for you to review before finalizing your SIP.
Once you have added the levels of description, click Create SIP. This will start a SIP on the Ingest tab.
Important
If you choose not to assign levels of description to directories in SIP arrange, AtoM will flatten the DIP so that all digital objects are child-level descriptions of the target description.
If you add levels of description to the SIP then metadata added through the form in Archivematica will not be included in the DIP.
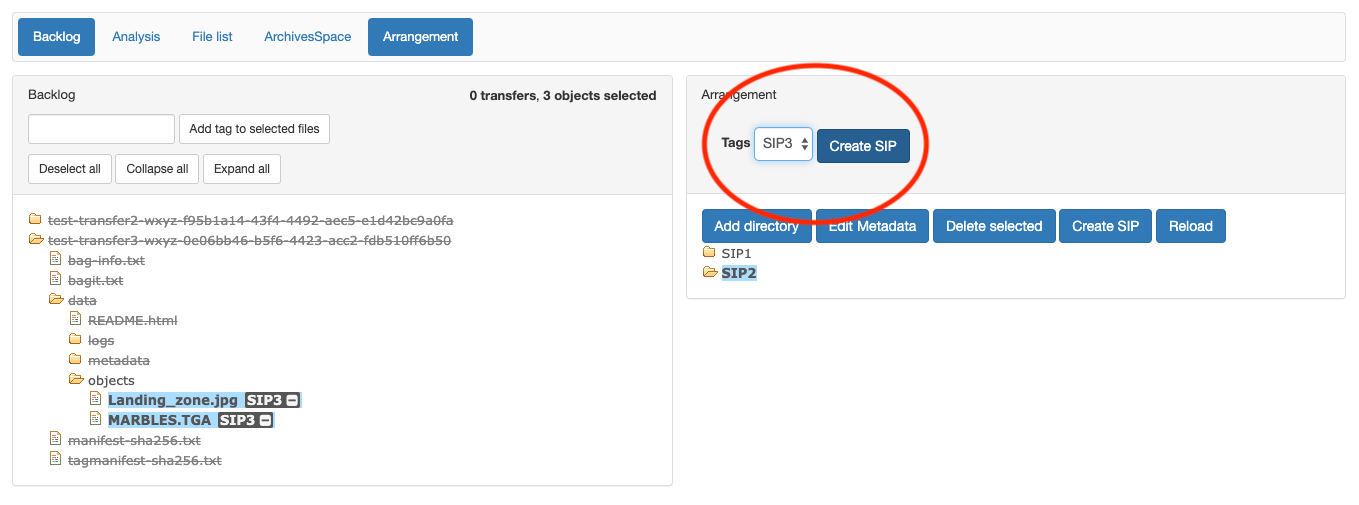
Creating a SIP using tags
You can also use tags as a quick way to generate new SIPs. For more information on adding tags, see tagging files.
- Tag all of the material in the backlog that you would like to combine into one SIP.
- At the top of the Arrangement pane, select a tag from the dropdown.
- Click Create SIP. Archivematica will automatically generate a new SIP and send it to Ingest using all the files that share this tag and using the tag as the SIP name.
Archivematica 1.10.2
Search
Open the general index or type your search in the search box.
Available projects
Archivematica
- Version 1.17.1 (stable-current)
- Version 1.16.0 (stable-previous)
- Version 1.15.1 (legacy)
- Version 1.14.1 (legacy)
- Version 1.13.2 (legacy)
- Version 1.12.2 (legacy)
- Version 1.11.2 (legacy)
- Version 1.10.2 (legacy)
- Version 1.9.3 (legacy)
- Version 1.8.1 (legacy)
- Version 1.7.2 (legacy)
- Version 1.6.1 (legacy)
- Version 1.5 (legacy)
- Version 1.4 (legacy)
Archivematica Storage Service
- Version 0.23.0 (stable-current)
- Version 0.22.0 (stable-previous)
- Version 0.21.1 (legacy)
- Version 0.20.1 (legacy)
- Version 0.19.0 (legacy)
- Version 0.18.1 (legacy)
- Version 0.17.1 (legacy)
- Version 0.16.1 (legacy)
- Version 0.15.1 (legacy)
- Version 0.14.1 (legacy)
- Version 0.13.0 (legacy)
- Version 0.12.0 (legacy)
- Version 0.11.1 (legacy)
- Version 0.10 (legacy)
- Version 0.9 (legacy)
- Version 0.8 (legacy)
License
Archivematica documentation by Artefactual Systems Inc. is licensed under a Creative Commons Attribution-ShareAlike 4.0 International License.
